Siemens LOGO! 8 Expansion DM16 24R (DC) – Expansion for Your Logic Controller
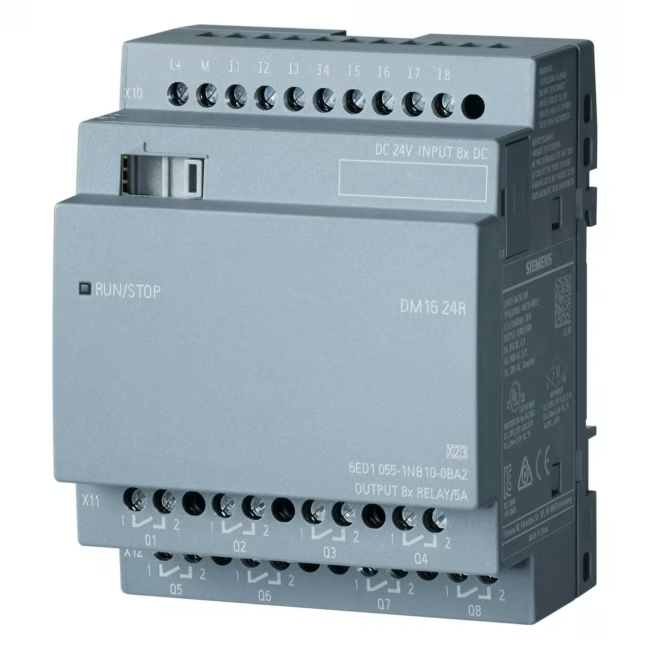
The Siemens LOGO! 8 DM16 24R (DC) is a digital expansion module for the LOGO! 8 range of logic controllers. It allows you to flexibly increase the input and output count of your existing control system.
8 digital inputs for sensors, push buttons, and switches
8 relay outputs for switching loads up to 3 A
Simple DIN rail mounting and connection via bus connector
Compatible with all LOGO! 8 base modules
Compact housing for use in distribution boards
What sets the LOGO! 8 Expansion DM16 24R apart
The module offers a reliable and cost-effective way to add extra I/O points to your controller. The relay outputs are isolated and suitable for both DC and AC loads.
Ideal for...
Industrial applications, building automation, machine control, and hobby projects. Particularly suitable for users who want to expand their LOGO! 8 controller with additional inputs and outputs without installing a completely new system.
How to use the LOGO! 8 Expansion DM16 24R
Mount the module on the DIN rail
Connect it to the base controller via the bus connector
Wire your sensors and actuators to the screw terminals
Configure the inputs and outputs in the LOGO! software
Siemens is a globally leading technology company headquartered in Munich. The company stands for innovation in automation, digitalization, and electrification. LOGO! 8 is a well-known series of logic controllers for industrial and building applications.
It is a digital expansion module for the LOGO! 8 family of logic controllers. It provides 8 digital inputs and 8 relay outputs powered by 24 V DC, allowing you to expand the I/O of your existing controller.
The DM16 24R is compatible with all LOGO! 8 base modules (e.g., 0BA7, 0BA8) that have an expansion port. It can also be used with older LOGO! 8 Basic modules.
Supply voltage 24 V DC, 8 digital inputs (24 V DC), 8 relay outputs (potential-free, max switching capacity 3 A / 250 V AC), no display, weight 0.30 kg.
The LOGO! 8 DM16 24R expansion module and a quick start guide. No additional cables or controllers are included.
Mount the module on the DIN rail, connect it to the base controller via the side bus connector. Wire the inputs and outputs using the screw terminals. Detailed installation instructions can be found in the manual.
Subscribe to the newsletter
New arrivals, promotions and exclusive offers — straight to your inbox.




Please complete your information below to login.
Sign In
Create New Account